
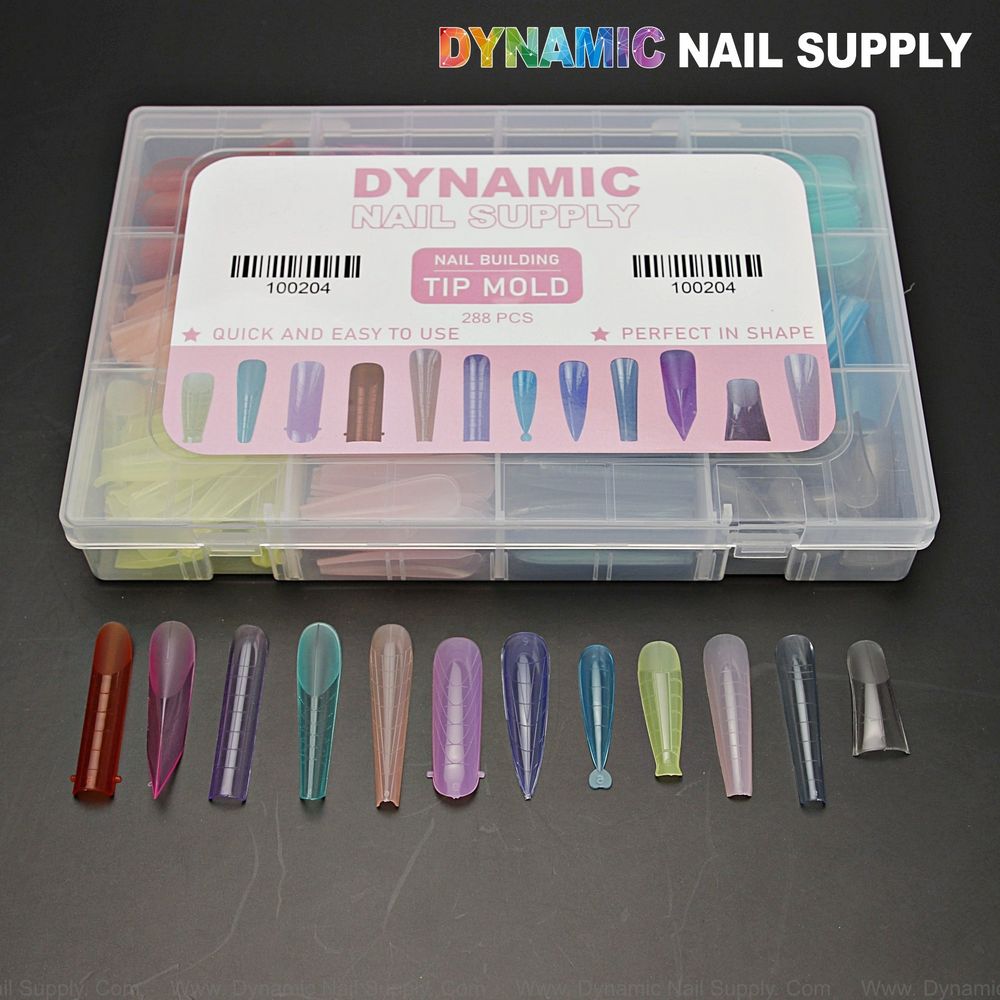
Dual-form systems changed how many technicians and home users build extensions: they speed up sculpting, lock in consistent curves, and cut down on heavy filing. The Nail Building Tip Mold set in this article is a 12-shape assortment intended for structure-building gels—read on to decide if this kit suits your workflow or whether another method would be smarter for your clients.
For a direct look at the product page, see dual form nail tips for the full kit and specifications.
What this 12-shape mold set includes
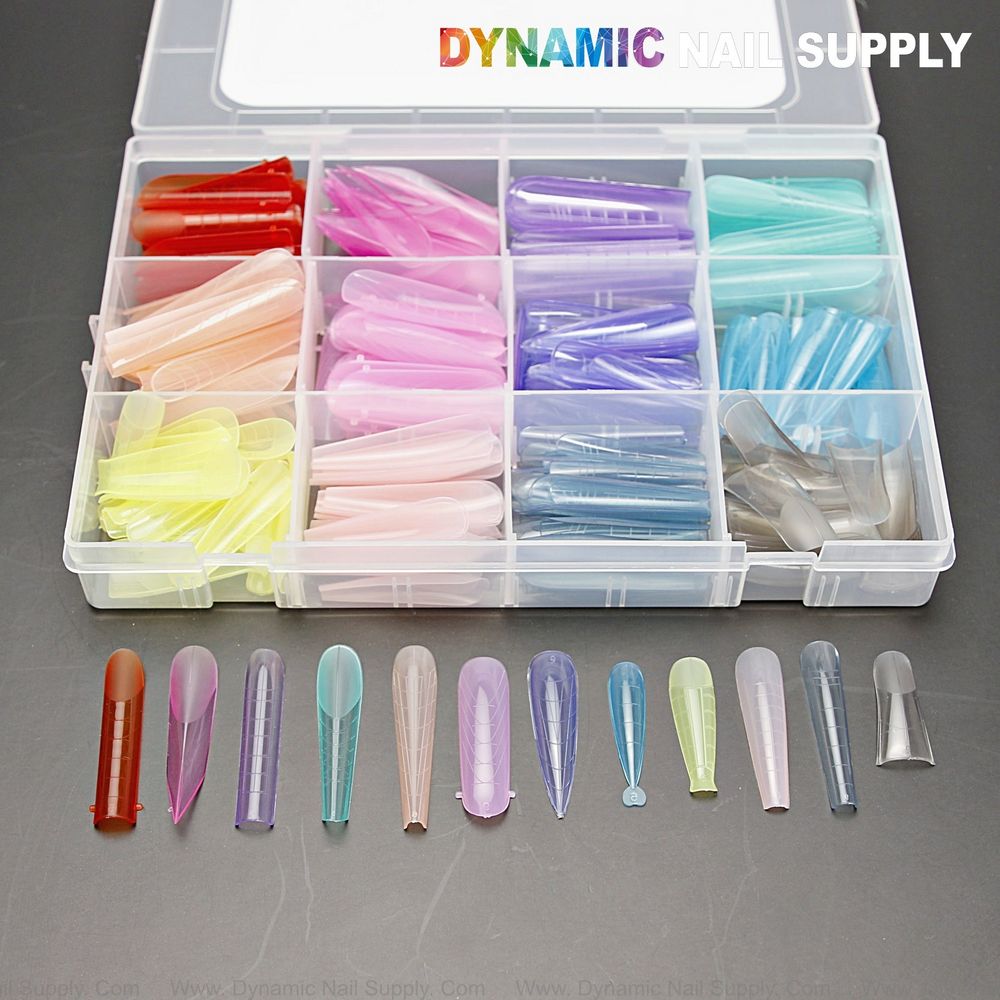
The set contains a large, reusable assortment of transparent dual forms in multiple lengths and widths. The selection offers a wide mix of silhouettes—classic and dramatic—so you can create everything from subtle natural shapes to pointed, fashion-forward tips. The translucent material lets light from UV/LED lamps pass through, and the molds are designed to release cleanly after a complete cure.
Key features that matter in real use
- Full assortment of shapes: A variety of silhouettes gives flexibility without buying separate kits for each look.
- Assorted sizes: Multiple widths fit different nail beds; choose the closest size and adjust as needed.
- Designed for building gels: Best used with thick, self-supporting products so the enhancement holds shape inside the mold before curing.
- Translucent construction: Allows easier placement of the product and efficient curing under lamps.
- Reusable and release-friendly: Molds are intended to come off smoothly once the gel is fully set.
Which gels pair best with these molds
This dual-form approach is optimized for thick, structure-building formulas. The manufacturer specifically recommends poly gels and hard builder gels for clean shaping and reliable apex control. Thin or highly flexible gels—such as rubber-base style or very runny bottle builders—may be too fluid and can shift inside the form before curing, so they’re not a good match.
Who should choose these dual form nail tips
If you fall into one or more of the categories below, this 12-shape, multi-size kit is a strong fit:
- Busy salon techs: Technicians who need predictable results and faster sculpting for clients with a wide variety of shape requests.
- Advanced DIYers: Experienced users who work confidently with poly gel or hard builder gel and want to save filing time.
- Design-focused stylists: Nail artists who switch between natural and dramatic silhouettes and value a single kit that covers many looks.
When to choose something else
There are situations where another tool or technique may be preferable:
- Very thin or flexible product users: If you primarily use rubber-base or thin bottle builder gels, they can run or deform inside the form—hand-sculpted extensions or tip overlays will perform better.
- Absolute beginners: Those brand-new to extension shaping might find full sculpting freehand (or pre-shaped press-on tips) easier at first than managing product volume inside a form.
- Ultra-custom structural work: For clients needing extreme profile tweaks or technical restructuring at the cuticle and apex, traditional sculpting with forms or a combination of nail tips and sculpting may offer more control.
Practical usage tips for cleaner, faster application
- Prep properly: Remove oils, push back cuticles, and lightly buff the nail surface so the enhancement adheres reliably.
- Pick the right size: Choose a mold that spans sidewall to sidewall; if you’re between sizes, opt for the slightly larger mold and refine the fit with filing.
- Mind product placement: Place thinner amounts near the cuticle and sides and add slightly more through the stress area to build a proper apex—avoid overloading the free edge.
- Control pressure: Seat the form at a shallow angle and lower it gently to prevent product displacement; wipe away any excess before curing.
- Curing sequence: Flash cure while holding the form if needed, then complete a full cure under a compatible UV/LED lamp following the gel manufacturer’s instructions.
- Release only after full cure: Let the gel finish its cure cycle completely, then remove the mold to minimize distortion and reduce filing time.
Care and safety notes
Keep molds clean and free of cured residue—wipe them after each use or soak and gently remove any hardened gel. Store them flat to preserve shape. Because these forms are designed to work with curing lamps, always follow the safety and handling guidelines of the gel products you use; ensure full curing before removing the mold to avoid lifting or breakage.
Final thoughts
This 12-shape, multi-size dual form kit is a time-saver for technicians and experienced gel users who rely on thick building products like poly gel and hard builder gel. It offers variety, translucency for lamp curing, and reusable convenience—making it a practical choice for salons and skilled DIYers alike. If your protocol leans toward thin, flexible gels or you prefer freehand sculpting, consider alternative systems better matched to those formulas. The kit is competitively priced at $12.00 and includes a broad selection to test many shapes without multiple purchases.
Recommended companion products from the same line include builder hard gel pods and poly gel formulations tailored for dual-form application.
